The can in the middle has expired 2010, the new one expires 2022! But it was good enough to finish the front bumper and the little foglight spats.
The two testpanels, the foglight spats. The quality of the paint on the bumper is fully dependable on the underground surface of the plastic, when one don't want to fill the surface with filler. Two different spats: left very smooth, right really rough.
Color check on the car. The Blue Lord is 23 years old, some refreshment of the paint wil be necessary, some day.
The front bumper after sanding and the first layer of plastic primer in my backyard
Strange stuff, that primer. It looks aweful, but when the paint is on, al irregularities are gone.
Didn't I tell you? A few layers of paint and the world looks different again.
Rough plastic surface, here too.
Commandant 4 (cleaner) and some old cloth to make an effort for more smoothness.
Right on the bleu paint, no clear vernish on.
After some polishing. Somewhat better results.
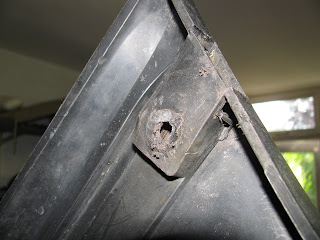
Oh yes, that nasty mounting point I had to demolish to get out that %^*(@#$-corroded screw.
I fiddled about a few hours to get the screw out.
This is how it's originally. Some thinking will be necessary to mount it good on the 33.


No comments:
Post a Comment